
Appearance
Your first H1 report
This walkthrough takes you from a plan PDF to an H1 report, ready for you to review and submit, using the plan-first workflow and a sample assembly. Allow about fifteen minutes for a simple single-storey house. Each step links to the fuller guide for that task. (On your first visit, a short welcome tour walks through this same path in the app, with short screen recordings - re-enable it any time under Settings → Profile.)
You need a plan PDF with at least a floor plan and a roof plan, and a known dimension on the drawing (a stated room size or a scale bar) so you can calibrate.
Prefer to explore a finished job first?
Every account's Dashboard carries read-only sample projects (the first is "123 Sample Street, Sampletown") - each a complete take-off, assemblies, AI plan summary and AI Review over a demonstration plan. View sample to look around, or Copy to edit for your own editable copy to experiment on. A report generated from a sample is marked "Sample" and never spends a report credit.
1. Create the project
From the Dashboard, click New H1 project, give it a name, and open it in the H1 Compliance page. More: Setting up a project.
2. Set the climate zone
In Project Information, set the Climate zone. Type the site's NZ postcode and Thermly looks up the zone, or pick one of the six H1/AS1 6th edition zones (Appendix C) directly. The zone selects the reference building your design is compared against. Not sure which zone applies? The free climate zone finder confirms it against the H1/AS1 territorial-authority table and can carry the confirmed zone into a new project.
3. Attach the plan
In Plan PDF (optional), attach the architectural plan set. The file uploads securely to your account and stays available to view and download whenever you reopen the project. More: Uploading and calibrating your plan.
Read the drawing set for you
With a plan attached, ✨ Read with AI on Project Information can pre-fill the site address, designer and consent reference from the drawing's title block for you to check and correct, and, when you have not picked a climate zone yet, the zone H1/AS1 Table C.1.1.2 gives the council the site address is in. And ✨ AI plan summary on the plan card opens a floating window listing everything the drawing set states that helps complete the form - insulation specs, window and door schedules, floor construction - with the plan page each item was read from. Scanned drawing sets are read too. AI features are on for every account by default, within a fair-use allowance; an administrator can switch them off for an account.
4. Calibrate the scale
Open the plan, pick the Calibrate tool, click two points on a known dimension, then enter the real distance. Everything you draw afterwards is measured against that scale.
Calibrate the page you are about to measure. A new diagram can inherit the scale from another page as a convenience, but if that page is plotted at a different scale the inherited areas will be wrong. Thermly tints an inherited scale amber and shows "Scale inherited from plan - re-calibrate for accurate areas" so you know to check it. See Re-calibration.
5. Take off the elements
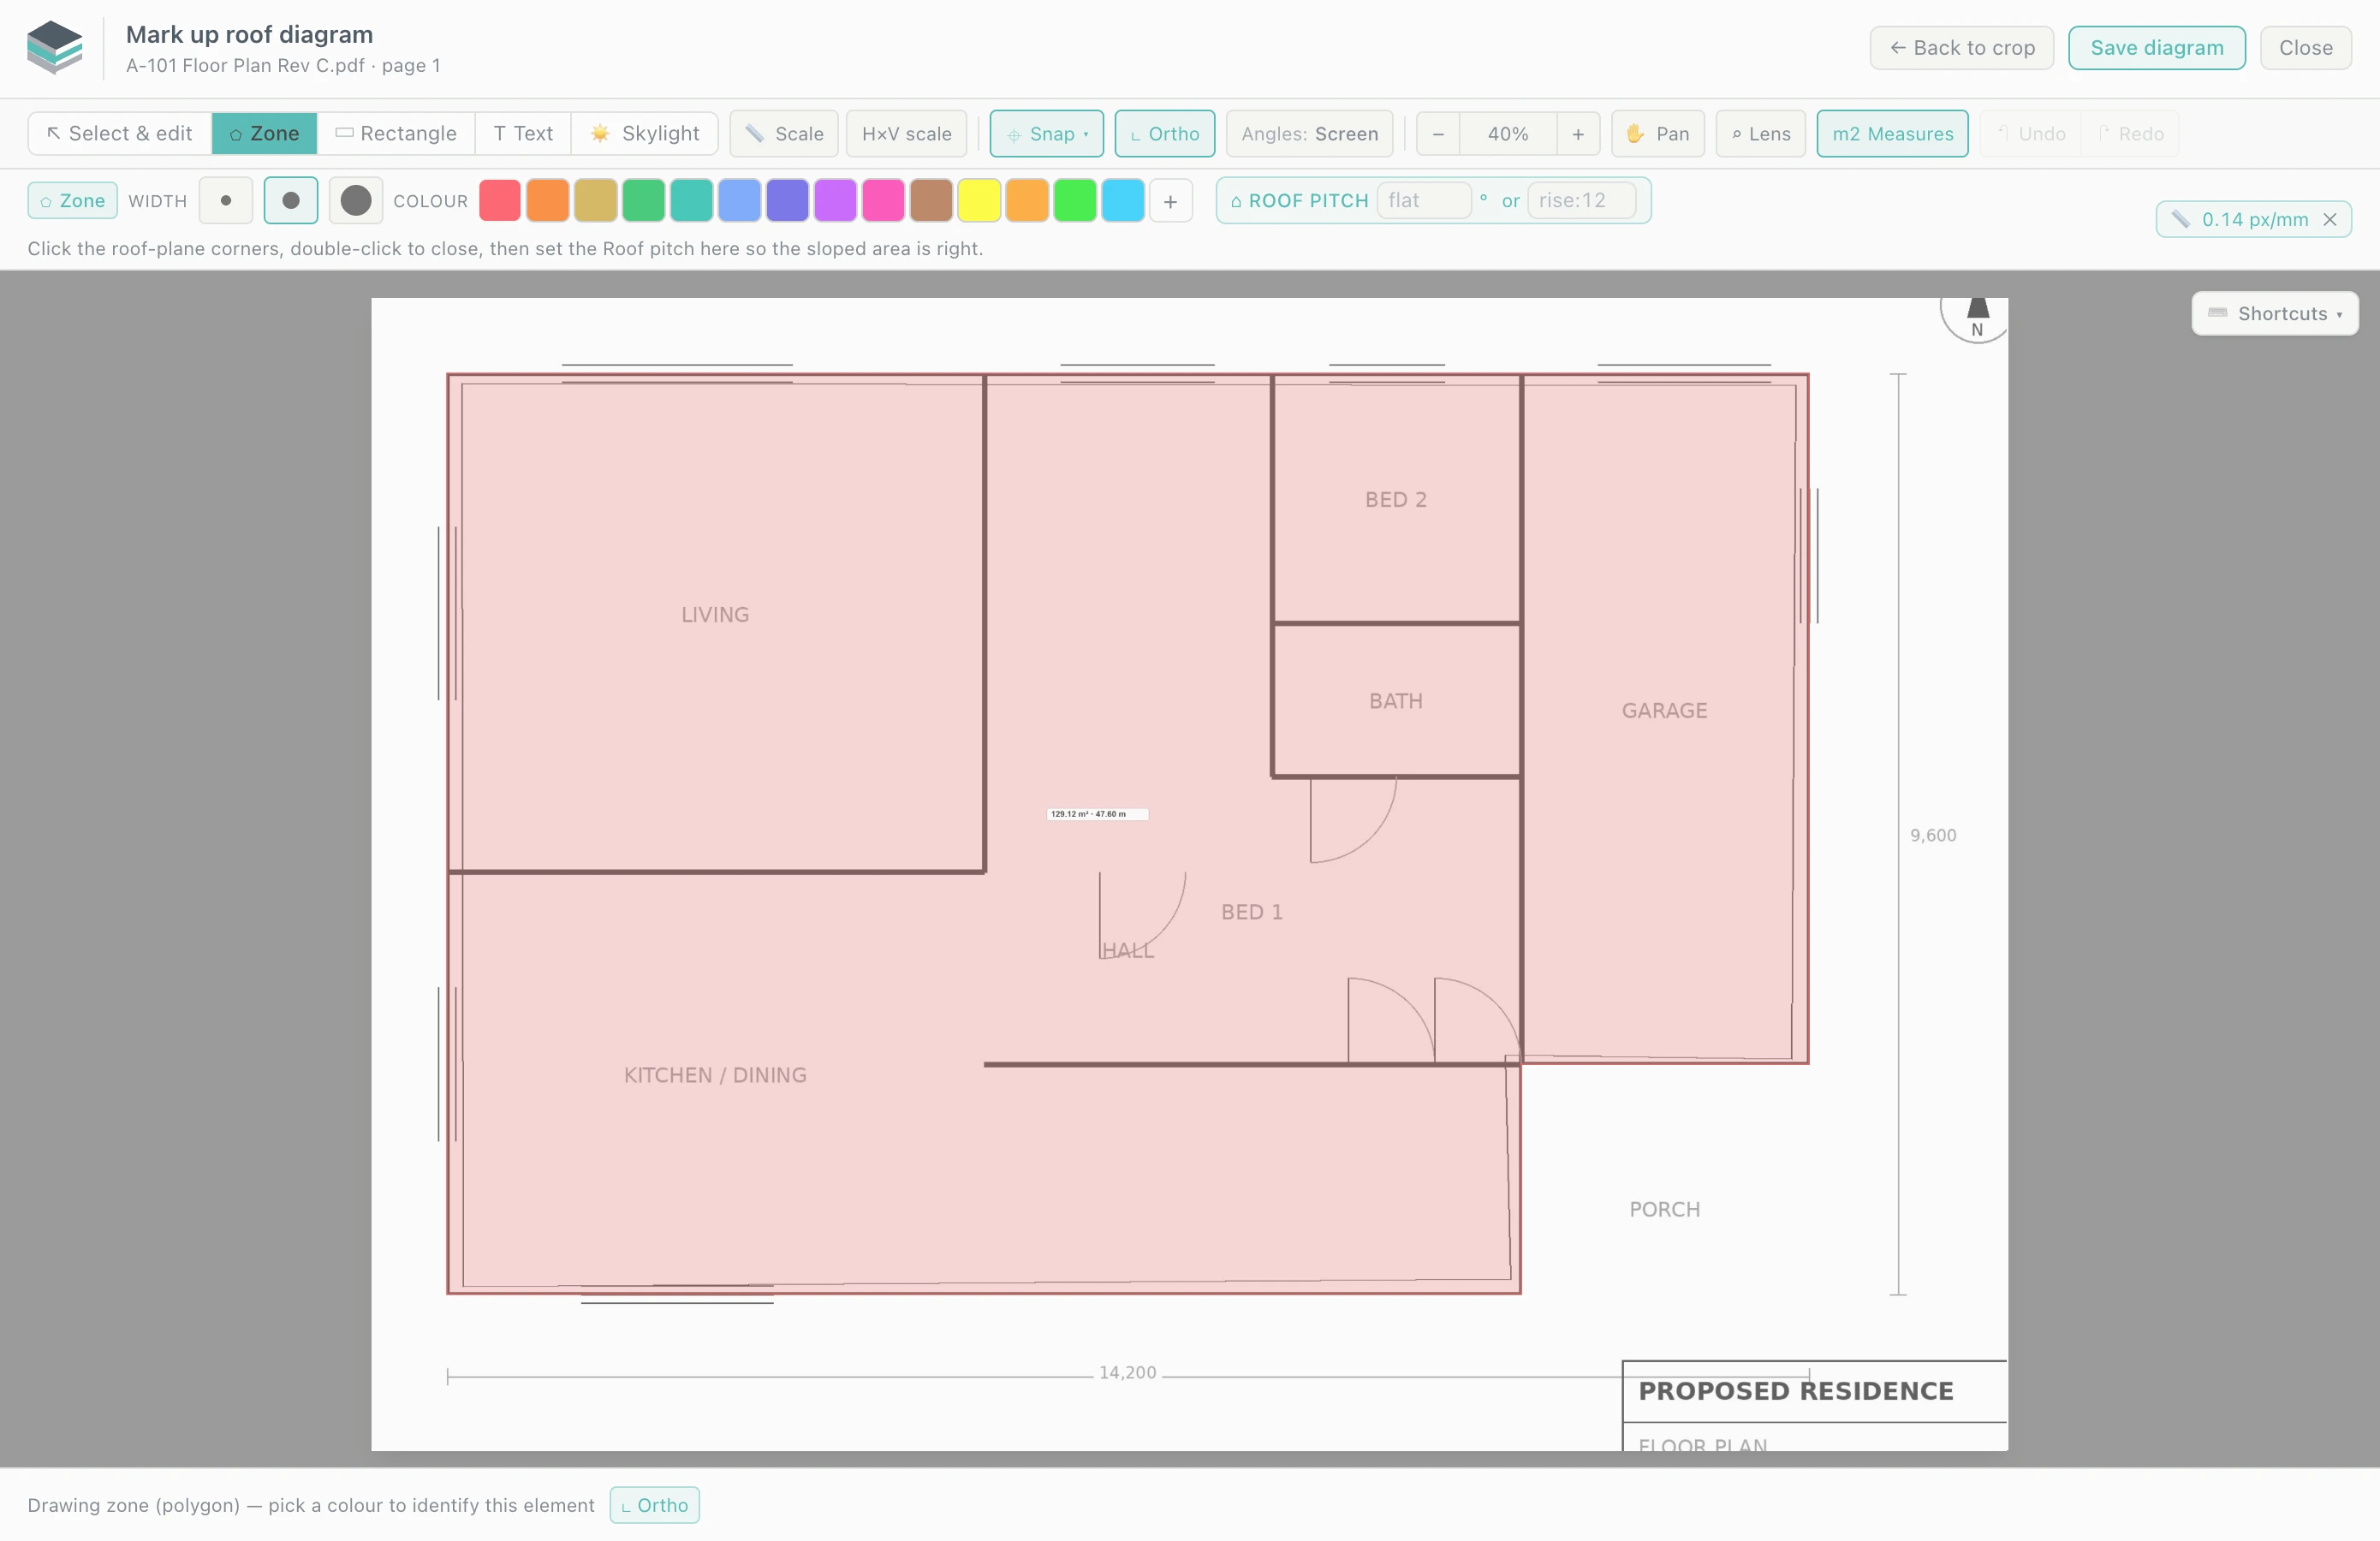
This is the heart of the plan-first workflow, and it is walls-first. Using the toolbar (full detail in The plan take-off):
- Walls - use the Line tool to trace each wall run; length × stud height gives the wall area. On a vector plan, the optional Wall take-off assist (Settings → Plan markup) picks a complete run per click, straight off the drawing's line-work.
- Openings - with the Opening tool, click a wall to drop a window or door, then confirm its width × height - on most plans the number and size prefill from the drawing's own text call-outs, or from its window and door schedule once the opening has its number. You can also place an opening with no size and enter it in the form later. Openings net out of the wall area automatically.
- Roof and floor - once the walls are traced, click 🧱 From walls on the Roofs and floor sections and Thermly derives them from the region your walls enclose - no re-tracing. Then record the Roof pitch, and tick Ceiling follows pitch on the roof row if the ceiling follows the rafters (a skillion or cathedral ceiling); under a flat ceiling the plan area is the right heat-loss area, and that is the default. (You can always trace them yourself with Zone or Rectangle instead.)
- Skylights - with the Skylight tool, click the roof and enter the skylight size.
Each shape carries a live area readout as you draw, and each element gets its own plan colour and tag (WA1, RO1, FL1 …) so the drawing and the legend stay readable. When the take-off is done, click Save diagram - the marked-up diagram is embedded in your report.
6. Assign a sample assembly
Every element needs an assembly, and assemblies are assigned in the form view: each traced element appears as a row on the H1 page with a Choose an assembly… picker. To get a result straight away, assign one of the sample assemblies Thermly ships - for example "Vented attic, R6.0 ceiling insulation" for the roof, and a framed-wall sample for the walls.
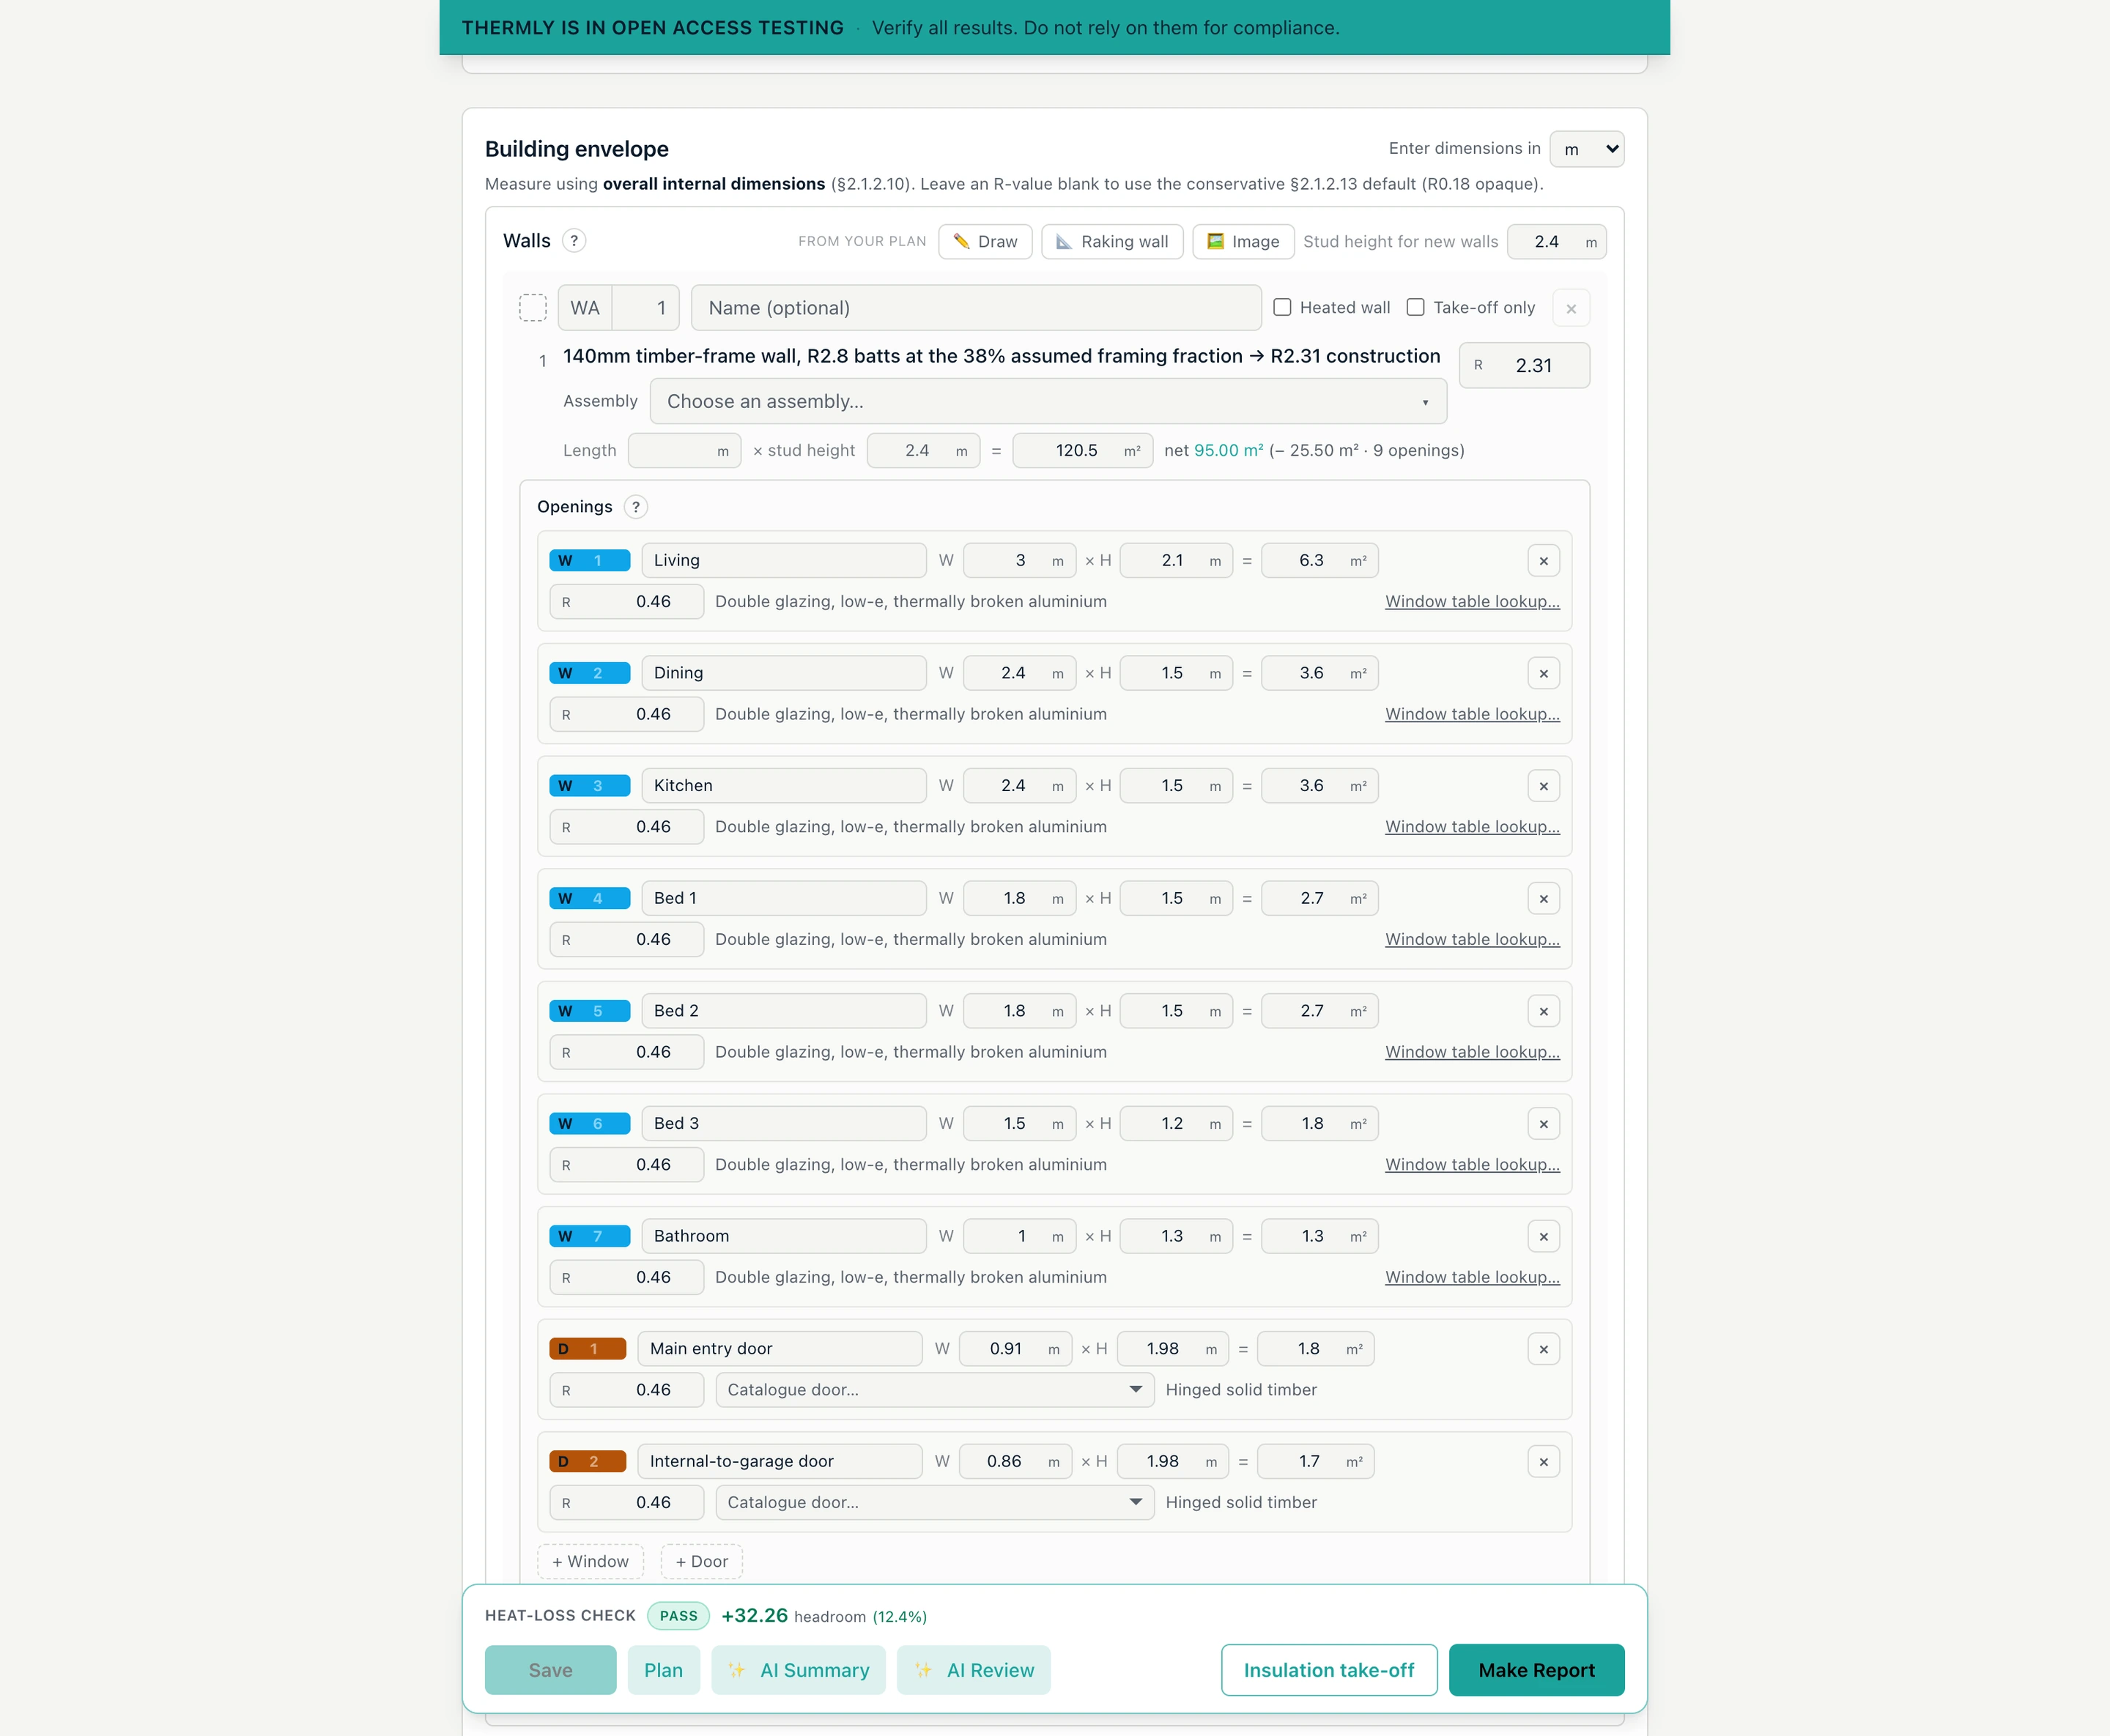
The sample produces a correct calculation immediately. When you are ready to reflect the real build-up, build your own assembly (it is the same short layer-by-layer form) or swap products in place from the H1 page.
7. Read the verdict
The report bar at the foot of the page carries the Heat-loss check: PASS or FAIL and your headroom against the reference building, updating live as you change the design. Where an element is still being counted at a conservative default because its construction is unfinished, the bar says so and names it, with a link to the row. If the check fails, the per-element rows and the hard-rule checks show why. More: Reading the H1 report.
Run AI Review before you generate
The AI Review button in the report bar runs a free pre-flight over your inputs: gaps (no climate zone, missing elements), compliance blockers (failed minimums, the glazing cap), and risks (thin headroom, incomplete build-ups). With a plan attached it also checks your entries against the drawings: each opening's size against the size the plan states for its tag, whether every floor plan of a multi-storey set was traced and, in an AI pass, the insulation spec against your chosen build-ups and the window schedule against your openings. Findings are advisory, each with a clause pointer to verify against; nothing from it prints on the report.
8. Fill in the details and generate
Complete Project Information (site address, consent reference, designer) - these appear on the report cover and headers. The report author comes from your Profile settings, so there is nothing to retype per project. Then click Make Report, at the right-hand end of the report bar - the project saves automatically first, so the report always reflects a saved version; during open testing you accept the pre-release terms before the PDF is produced. If the button is disabled, the bar says what is still needed.
Thermly renders a PDF: the compliance result, the schedule of building elements and their build-ups, your plan diagrams, and a declaration block for the preparer and reviewer to complete. Review it, satisfy yourself it is correct and complete for the building, and it is ready to attach to a consent application. More: Generating your H1 report.
9. Save
Generating already saved the project, so it is on your Dashboard; click Save as you make further changes. Between saves your work is autosaved as a draft, so a closed tab does not lose it. You can reopen, revise, and re-generate at any time.
What next
- Build real assemblies: Assemblies and products.
- Order the insulation: Generating your insulation take-off.
- Understand the numbers: How Thermly calculates compliance.